Ages 5 to 8
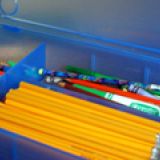
My favorite thing about the beginning of a new school year is buying new school supplies. My son used to be notorious for losing school supplies. Well, I solved that problem by putting together a Personalized Homework Box. Going back to school can be intimidating, and it's nice to have some personalized easy-to-make crafts, like this Personalized Homework Box below!
by Cate O'Malley
What you'll need
- plastic box with dividers
- ribbon
- scissors
- tape
- crazy glue
- stickers
- markers
- construction paper
How to make it
1. Cut four pieces of ribbon to match the sides of the box so you can create a border (as shown in the photos). Affix the ribbon onto the top of the box using crazy glue so that it will stand up to daily use for the next nine months.
2. Personalize the top of your Schoolwork Box by featuring your child's name. You can use stickers, or cut letters from construction paper and glue them to the box top. The stickers we used came from Target's Dollar Spot (love that!). I used them to label Nick's Supplies on the top of the box.
3. Customize the rest of the box top. I let my son choose what he wanted to do, and he went with a sports theme for the top. Keeping it simple, he chose scrapbooking stickers of football gear.
4. To decorate the inside of the box, we went with yellow stars: Have your child draw several yellow stars or other shapes on the construction paper.
5. Using scissors, cut out the shapes.
6. We made little springs to attach our stars to the inside of the boxtop. The make springs, cut out a thin strip from your construction paper and fold it accordion-style. Using the tape affix one end of your accordion strip to the cut-out star shape and the other end to the inside of the boxtop. Do this for all your cut-out shapes. Voila! Now, when you open the box, they will pop up!
7. Add whatever decorations your child chooses, fill with supplies, and go!


