Ages school-age
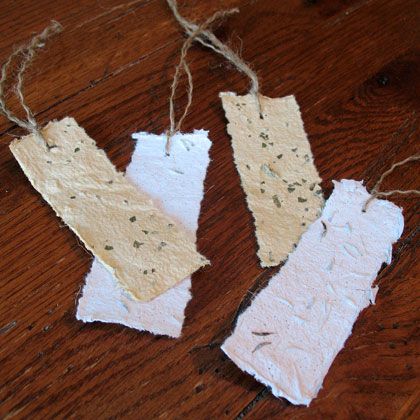
These seeded paper bookmarks are not only lovely looking – you can reuse them by planting them into the ground and watching them grow into a plant or flower! This is a really fun project and makes a marvelous gift. One batch can make many bookmarks, so save a few for yourself!
by Amanda Formaro
What you'll need
- 8 jumbo craft sticks
- 12"x12" piece of window screen or cheesecloth
- White craft glue
- Black electrical tape
- Plain white copy paper or art paper
- Water
- Blender
- 13" x 9" baking pan
- Flower and herb seeds
- Dried herbs to match seeds
- Ground cinnamon
- Two old kitchen towels
- Hemp cord
- Spoon
- Sponge
- Scissors
- Hole punch
Helpful Tip:
Copy paper, construction paper, and even newspaper are all safe, compost materials. Avoid glossy papers such as magazines. Flower seeds, herb seeds, dried herbs, and even flower petals will look wonderful in your seeded paper. These bookmarks can be planted! Just tear into a few pieces and plant the whole thing right into the ground. Hemp is also a natural material, so it's not necessary to remove it. If you have extra seeded paper, tear it into a few pieces, wet a piece of paper towel, and put the paper towel and the seeded paper into a zipper sandwich bag until the seeds sprout!
How to make it
1. To make the frame for the screen you will need, glue together the corners of 4 jumbo craft sticks, and then lay the screen or cheesecloth over the frame, completely covering it. (See photo.)
2. Glue a second layer of craft sticks to two opposite sides of the frame -- securing the cheesecloth between the bottom and top layers. Trim the ends off of the two remaining craft sticks and glue those along the remaining sides of the frame. Be sure to pull the cheesecloth tight as you glue the sticks in place. Let dry. (See photo.)
3. Trim the edges, leaving a bit of cheesecloth hanging over the ends. Using black electrical tape, cover the craft stick frame, tucking the overlapping cheesecloth under the tape. Do not skip this step as it will help protect the craft sticks from the water. (See photo.)
4. Tear pieces of paper into squares about 1-2" wide. Place squares into blender and cover with warm water. Turn the blender on and process until a thin paste is formed.
5. Fill a 13x9 baking pan halfway with warm water. Pour the paper paste from the blender into the warm water in the pan. Stir gently. For flower bookmarks, add flower seeds, small bits of cut up hemp cord and sprinkle with ground cinnamon. For herb bookmarks, use beige art or construction paper, basil seeds, and sprinkle with dried basil. Stir. (See photo.)
6. Place a clean kitchen towel on a nearby counter and have a sponge and another towel waiting as well.
7. Dip your screen frame into the mixture, going underneath the layer of paper and seeds. As if panning for gold, gently bring frame to the surface and move back and forth to get a fairly even surface on your screen. Lift straight up out of the water and allow excess water to drip off. (See photo.)
8. Carefully carry you screen to the towel on the counter and set the screen down on top of it. Place the second kitchen towel on top of the screen and flip everything upside down and place back on the counter. Remove the towel that is now on the top.
9. Use a kitchen sponge to press firmly down on top of the screen getting as much excess water out as you can. (See photo.)
10. Lift the frame up and gently loosen your seeded paper. You may need to clean off the edges of the frame and gently coax a corner loose, but the rest should fall out easily. (See photo.)
11. Place your sheets of seeded paper onto a wire rack to dry, place under a light to speed up the process. (See photo.) This method can cause the paper to curl. Once they begin to curl, fold a dry kitchen towel around the paper sheets and place several heavy books on top to help flatten your paper. Leave like this for a couple of hours.
12. Tear each sheet gently into 3 pieces. (See photo.) Use a hole punch to make a hole about ¾" from the top. Thread a string of hemp cord through the hole. Tie the cord in a knot and trim the ends to be even if you wish.


