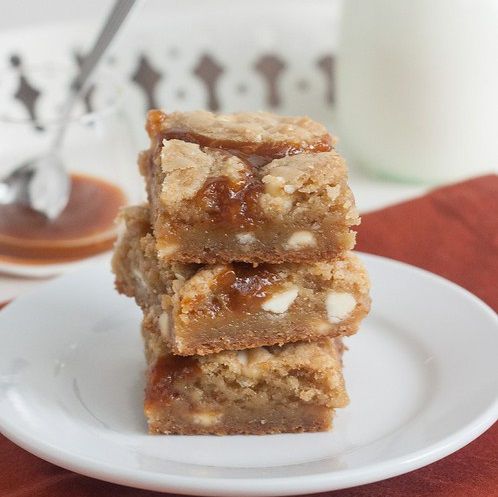
This recipe is a riff on one of my favorite desserts from the archives: salted caramel chocolate chip cookie bars. The two biggest changes I made were to replace the salted caramel with salted pumpkin caramel and swap out the semisweet chocolate chips for white chocolate chips. Pumpkin and white chocolate are a highly underrated combo as far as I’m concerned. The bars are sweet, salty, and oh so gooey – totally irresistible!
The pumpkin flavor is subtle here, it just gives the bars a little something extra you can’t quite put your finger on. If you wanted to up the seasonal goodness, you could add warm fall spices to the caramel sauce, the cookie bars, or both.
By Tracey
Salted Pumpkin Caramel White Chocolate Cookie Bars
pumpkin caramel sauce just barely adapted from Cook Like a Champion
(Note: you can make the caramel ahead of time. Store in an airtight container in the refrigerator and warm slightly in the microwave before using.)
Ingredients:
Salted Pumpkin Caramel
- 1/2 cup granulated sugar
- 1/2 cup heavy cream
- 1/4 cup pumpkin puree
- 1/2 teaspoon coarse salt
- pinch ground cinnamon
- 1/4 teaspoon vanilla extract
Cookie Bars
- 2 1/8 cups (10 1/2 oz) all-purpose flour
- 1/2 teaspoon baking soda
- 1/2 teaspoon salt
- 12 tablespoons unsalted butter, melted and cooled slightly
- 1 cup (7 oz) light brown sugar
- 1/2 cup (3 1/2 oz) granulated sugar
- 1 large egg, at room temperature
- 1 large egg yolk, at room temperature
- 1 1/2 teaspoons vanilla extract
- 1 cup white chocolate chips
- 6-7 tablespoons salted pumpkin caramel sauce
- fleur de sel, for sprinkling
Directions:
To make the caramel: Spread the sugar in an even layer in a medium skillet. Set the pan over medium-low to medium heat and let the sugar sit untouched until it starts to melt around the edges – it’ll seem like it takes forever to start melting, but once it gets going, it goes fast. Once it melts around the edges, gently stir with a rubber spatula until it liquifies completely. Continue cooking until the sugar turns an amber color, swirling the pan occasionally – keep an eye on it, it can burn quickly. Remove the pan from the heat and add the cream (careful, the mixture will bubble up!). Whisk to combine – if there are hardened bits of caramel, set the pan back over low heat until melted. Whisk in the pumpkin, salt, cinnamon, and vanilla until combined. Strain the caramel into a heatproof bowl and set aside to cool slightly while you make the cookie dough.
To make the cookie bars: Preheat oven to 325 F with a rack in the lower third. Spray an 8×8-inch baking pan with nonstick cooking spray, then line the pan with aluminum foil, leaving an overhang on opposite sides to allow you to lift the bars out after baking. Spray the foil with nonstick cooking spray.
In a medium bowl, whisk the flour, baking soda and salt together. In a second bowl, combine the butter and both sugars, whisking until combined. Add the egg, egg yolk and vanilla and whisk to completely incorporate. Add the dry ingredients to the wet, and use a rubber spatula to fold the dry into the wet just until combined. (The batter will be quite thick.) Use the rubber spatula to fold in the chocolate chips.
Transfer half of the batter to the prepared pan, pressing it into an even layer in the bottom. Pour the caramel sauce over the cookie dough, leaving just a little space around the edges. Use a small cookie scoop to dollop the remaining cookie dough over the salted caramel. Press down gently with your fingertips to distribute. It’s fine if the caramel layer isn’t completely covered – it will spread to cover as it bakes. Sprinkle the top with fleur de sel (don’t be afraid to give them a generous sprinkling – there’s a lot of sweetness in the bars). Bake for 35-40 minutes, or until the bars are golden brown and slightly firm to the touch. The bars will begin to pull away from the sides of the pan when they’re done.
Remove the pan to a wire rack. Let the bars cool completely before lifting them out of the pan and cutting into squares to serve. They’re pretty gooey on the first day, so you might want to refrigerate before cutting for the neatest results.


