Total Time 30 minutes or less Ages school-age
Do you have a Mickey and Minnie Mouse fan on your gift list? Make these adorable gift card holders from duct tape and give your gift cards in true Disney style! Step by step instructions will help you create these holders in a snap.
What you'll need
- Duct Tape: black, red, pink polka dot
- 2 pairs self adhesive Velcro circles
- 2 small white buttons
- Gift card or credit card for sizing purposes
- Scissors and/or craft knife
- Ruler
- Cutting mat (optional)
Helpful Tip:
If you like to make duct tape crafts, start collecting your scraps by wadding them together and making a ball. The more projects you make, the bigger your ball will become! It's a fun way to keep your work surface free of scraps.
How to make it
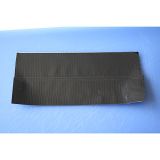
1. If you have a cutting mat or plastic cutting board, it can make this step easier, though it isn't required. Measure and cut a strip of black duct tape, 8 1/2 inches long. Measure and cut a second strip the same length and stick it to the first one, slightly overlapping the edge to create a (roughly) 4x8 strip. Repeat this to create a second 4x8 strip.
2. Lift one of the 4x8 strips off the cutting mat and line it up, sticky side to sticky side, with the other 4x8 strip, sandwiching them together. Use scissors or a craft knife to trim the edges, cutting the total size down to 2 1/2-inches wide by 8-inches long (2.5 x 8).
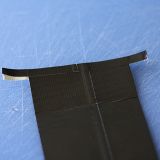
3. Place your gift card onto the black tape strip and fold up the bottom flap, leaving just a small amount of the gift card showing. This should allow the top piece to fold down over and cover the gift card with a little room to spare.
4, Cut a strip of black tape and cover the edge of the top flap, trimming off the excess.
5. Cut a strip of black tape and cover the edges of both sides, making sure there's room to slide the gift card in and out.
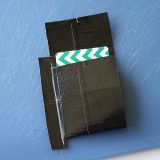
6. Both Mickey and Minnie designs will follow this step. For Minnie use the pink polka dot tape, for Mickey use red.
Measure and cut a strip of tape long enough to wrap around the bottom of the gift card holder. Stick the tape to the bottom section of the holder, overlapping by about 1/4-inch on the bottom.
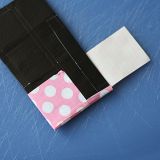
7. Turn the gift card holder over and using the photo as a guide, cut the excess overlap so that it's only as wide as the bottom of the holder.
8. Fold the bottom flap of tape up and stick it to the holder. Repeat with the side flaps.
At this point you are finished with the basic gift card holder design that will be used for both the Mickey and Minnie.
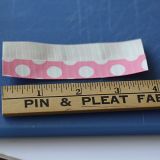
9. To make Minnie's bow, measure and cut a 4-inch strip of pink polka dot tape. Fold the tape into thirds lengthwise, so there are no sticky edges showing.
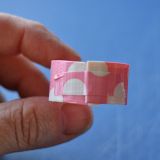
10. Roll that piece of tape into a ring and secure with a small piece of tape.
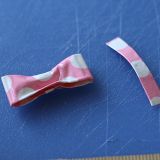
11. Flatten the ring of tape and pinch in the center to create the bow. Create a small strip of tape by folding it in thirds and wrap around the center of the bow, securing it with a piece of tape.
12. Instead of using glue, roll up small pieces of tape and attach to the back of the bow to stick it to the front flap of the gift card holder.
For Mickey, use small glue dots to attach the two white buttons to the front red section of the holder.
13. For both Mickey and Minnie, attach self adhesive Velcro circles to the flap.
14. To make the ears, measure and cut two strip of black tape 10-inches long. Stick them to each other, sticky side to sticky side. Cut out four circles measuring 1 1/2 (one and a half) inches in diameter. Use small pieces of black tape to attach the circles to the back of the holder.
15. Finally, to keep the ears secure, roll a small piece of tape and stick it between the ear and the front of the holder.
Insert gift card and give to your favorite Mickey and/or Minnie fan!


